# Lint Check Unit Testing
Lint has a dedicated testing library for lint checks. To use it,
add this dependency to your lint check Gradle project:
```
testImplementation "com.android.tools.lint:lint-tests:$lintVersion"
```
This lends itself nicely to test-driven development. When we get bug
reports of a false positive, we typically start by adding the text for
the repro case, ensure that the test is failing, and then work on the
bug fix (often setting breakpoints and debugging through the unit test)
until it passes.
## Creating a Unit Test
Here's a sample lint unit test for a simple, sample lint check which
just issues warnings whenever it sees the word “lint” mentioned
in a string:
~~~~~~~~~~~~~~~~~~~~~~~~~~~~~~~~~~~~~~~~~~~kotlin linenumbers
package com.example.lint.checks
import com.android.tools.lint.checks.infrastructure.TestFiles.java
import com.android.tools.lint.checks.infrastructure.TestLintTask.lint
import org.junit.Test
class SampleCodeDetectorTest {
@Test
fun testBasic() {
lint().files(
java(
"""
package test.pkg;
public class TestClass1 {
// In a comment, mentioning "lint" has no effect
private static String s1 = "Ignore non-word usages: linting";
private static String s2 = "Let's say it: lint";
}
"""
).indented()
)
.issues(SampleCodeDetector.ISSUE)
.run()
.expect(
"""
src/test/pkg/TestClass1.java:5: Warning: This code mentions lint: Congratulations [SampleId]
private static String s2 = "Let's say it: lint";
∼∼∼∼∼∼∼∼∼∼∼∼∼∼∼∼∼∼∼∼
0 errors, 1 warnings
"""
)
}
}
~~~~~~~~~~~~~~~~~~~~~~~~~~~~~~~~~~~~~~~~~~~
Lint's testing API is a “fluent API”; you chain method calls together,
and the return objects determine what is allowed next.
Notice how we construct a test object here on line 10 with the `lint()`
call. This is a “lint test task”, which has a number of setup methods
on it (such as the set of source files we want to analyze), the issues
it should consider, etc.
Then, on line 23, the `run()` method. This runs the lint unit test, and
then it returns a result object. On the result object we have a number
of methods to verify that the test succeeded. For a test making sure we
don't have false positives, you can just call `expectClean()`. But the
most common operation is to call `expect(output)`.
!!! Tip
Notice how we're including the whole text output here; including not
just the error message and line number, but lint's output of the
relevant line and the error range (using ~~~~ characters).
This is the recommended practice for lint checks. It may be tempting
to avoid “duplication” of repeating error messages in the tests
(“DRY”), so some developers have written tests where they just
assert that a given test has say “2 warnings”. But this isn't
testing that the error range is exactly what you expect (which
matters a lot when users are seeing the lint check from the IDE,
since that's the underlined region), and it could also continue to
pass even if the errors flagged are no longer what you intended.
Finally, even if the location is correct today, it may not be
correct tomorrow. Several times in the past, some unit tests in
lint's built-in checks have started failing after an update to the
Kotlin compiler because of some changes to the AST which required
tweaks here and there.
## Computing the Expected Output
You may wonder how we knew what to paste into our `expect` call
to begin with.
We didn't. When you write a test, simply start with
`expect("")`, and run the test. It will fail. You can now
copy the actual output into the `expect` call as the expected
output, provided of course that it's correct!
## Test Files
On line 11, we construct a Java test file. We call `java(...)` and pass
in the source file contents. This constructs a `TestFile`, and there
are a number of different types of test source files, such as for
Kotlin files, manifest files, icons, property files, and so on.
Using test file descriptors like this to **describe** an input file has
a number of advantages over the traditional approach of checking in
test files as sources:
* Everything is kept together, so it's easier to look at a test and see
what it analyzes and what the expected results are. This is
particularly important for complex lint checks which test a lot of
scenarios. As of this writing, `ApiDetectorTest` has 157 individual
unit tests.
* Lint can provide a DSL to construct test files easily. For example,
`projectProperties().compileSdk(17)` and
`manifest().minSdk(5).targetSdk(17)` construct a `project.properties`
and an `AndroidManifest.xml` file with the correct contents to
specify for example the right element setting up the
`minSdkVersion` and `targetSdkVersion`.
For icons, we can construct bitmaps like this:
```
image("res/mipmap-hdpi/my_launcher2_round.png", 50, 50)
.fillOval(0, 0, 50, 50, 0xFFFFFFFF)
.text(5, 5, "x", 0xFFFFFFFF))
```
* Similarly, when we construct `java()` or `kotlin()` test sources, we
don't have to name the files, because lint will analyze the source
code and figure out what the class file should be named and where to
place it.
* We can easily “parameterize” our test files. For example, if you want
to run your unit test against a 100K json file, you can construct it
programmatically; you don't have to check one in. As another example
you can programmatically create a number of repetitive scenarios.
* Since test sources often (deliberately!) have errors in them (which
is relevant when lint is unning on the fly inside the IDE editor),
this sometimes causes problems with the tooling; for example, some
code review tools will flag “disallowed” constructs or things like
tabs or trailing spaces, which may be deliberate in a lint unit test.
* You can test running in single-file mode, which is how lint is run
on the fly in the editor.
* Lint originally checked in test sources as individual files.
Unfortunately over time, source files ended up getting reused by
multiple tests. And that made it harder to make changes, or figure
out whether test sources are still in use, and so on.
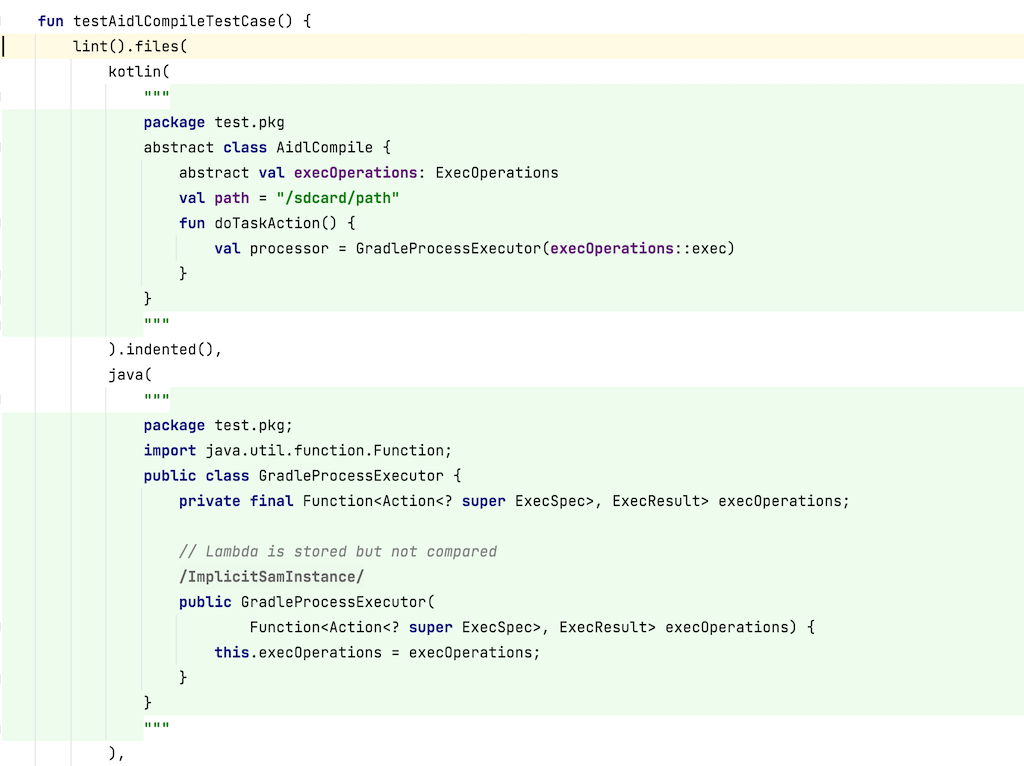
* Last but not least, because all the test construction methods
specify the correct mime type for their string parameters, IntelliJ
will actually syntax highlight the test source declarations! Here's
how this looks:

* Finally, but most importantly, with the descriptors of your test
scenarios, lint can re-run your tests under a number of different
scenarios, including modifying your source files and project layout.
This concept is documented in more detail in the [test
modes](test-modes.md.html) chapter.
## Trimming indents?
Notice how in the above Kotlin unit tests we used raw strings, **and**
we indented the sources to be flush with the opening `"""` string
delimiter.
You might be tempted to call `.trimIndent()` on the raw string.
However, doing that would break the above nested syntax highlighting
method (or at least it used to). Therefore, instead, call `.indented()`
on the test file itself, not the string, as shown on line 20.
Note that we don't need to do anything with the `expect` call; lint
will automatically call `trimIndent()` on the string passed in to it.
## Dollars in Raw Strings
Kotlin requires that raw strings have to escape the dollar ($)
character. That's normally not a problem, but for some source files, it
makes the source code look **really** messy and unreadable.
For that reason, lint will actually convert $ into $ (a unicode wide
dollar sign). Lint lets you use this character in test sources, and it
always converts the test output to use it (though it will convert in
the opposite direction when creating the test sources on disk).
## Quickfixes
If your lint check registers quickfixes with the reported incidents,
it's trivial to test these as well.
For example, for a lint check result which flags two incidents, with a
single quickfix, the unit test looks like this:
```
lint().files(...)
.run()
.expect(expected)
.expectFixDiffs(
""
+ "Fix for res/layout/textsize.xml line 10: Replace with sp:\n"
+ "@@ -11 +11\n"
+ "- android:textSize=\"14dp\" />\n"
+ "+ android:textSize=\"14sp\" />\n"
+ "Fix for res/layout/textsize.xml line 15: Replace with sp:\n"
+ "@@ -16 +16\n"
+ "- android:textSize=\"14dip\" />\n"
+ "+ android:textSize=\"14sp\" />\n");
```
The `expectFixDiffs` method will iterate over all the incidents it
found, and in succession, apply the fix, diff the two sources, and
append this diff along with the fix message into the log.
When there are multiple fixes offered for a single incident, it will
iterate through all of these too:
```
lint().files(...)
.run()
.expect(expected)
.expectFixDiffs(
+ "Fix for res/layout/autofill.xml line 7: Set autofillHints:\n"
+ "@@ -12 +12\n"
+ " android:layout_width=\"match_parent\"\n"
+ " android:layout_height=\"wrap_content\"\n"
+ "+ android:autofillHints=\"|\"\n"
+ " android:hint=\"hint\"\n"
+ " android:inputType=\"password\" >\n"
+ "Fix for res/layout/autofill.xml line 7: Set importantForAutofill=\"no\":\n"
+ "@@ -13 +13\n"
+ " android:layout_height=\"wrap_content\"\n"
+ " android:hint=\"hint\"\n"
+ "+ android:importantForAutofill=\"no\"\n"
+ " android:inputType=\"password\" >\n"
+ " \n");
```
## Library Dependencies and Stubs
Let's say you're writing a lint check for something like the Android
Jetpack library's `RecyclerView` widget.
In this case, it's highly likely that your unit test will reference
`RecyclerView`. But how does lint know what `RecyclerView` is? If it
doesn't, type resolve won't work, and as a result the detector won't.
You could make your test “depend” on the `RecyclerView`. This is
possible, using the `LibraryReferenceTestFile`, but is not recommended.
Instead, the recommended approach is to just use “stubs”; create
skeleton classes which represent only the **signatures** of the
library, and in particular, only the subset that your lint check cares
about.
For example, for lint's own `RecyclerView` test, the unit test declares
a field holding the recycler view stub:
```
private val recyclerViewStub = java(
"""
package android.support.v7.widget;
import android.content.Context;
import android.util.AttributeSet;
import android.view.View;
import java.util.List;
// Just a stub for lint unit tests
public class RecyclerView extends View {
public RecyclerView(Context context, AttributeSet attrs) {
super(context, attrs);
}
public abstract static class ViewHolder {
public ViewHolder(View itemView) {
}
}
public abstract static class Adapter {
public abstract void onBindViewHolder(VH holder, int position);
public void onBindViewHolder(VH holder, int position, List